Audio Spectrum Analyzer: Planning

Awhile back when I was looking for simple electronics projects, I found this Easy LED Color Organ project.  It was easy enough to breadboard, but the results weren't very interesting   since it was just on or off for bass, treble, etc.

Then I found this Audio Spectrum Analyzer project, and that seemed more promising, though according to a friend the circuitry was not very well designed.  Instead he recommended using the circuitry to isolate the frequency bands used in this more complex version of the LED Color Organ. I combined that with the 10 LED displays from the spectrum analyzer, using the suggested LM3916 chip to drive the display as a simpler replacement for several resistors and other components.

The initial schematic looks something like this, with stereo input and output and some overall volume controls. There's probably still some changes that need to be made or bugs that need to be fixed, but I'll iron those out when I run into them.

Schematic

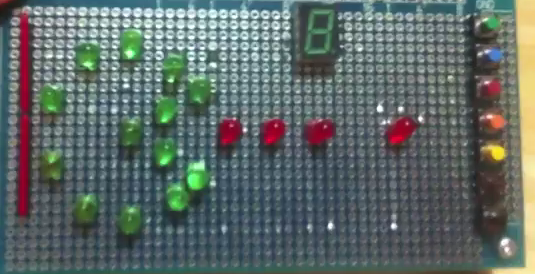
I breadboarded most of that circuit for a test and took a video.

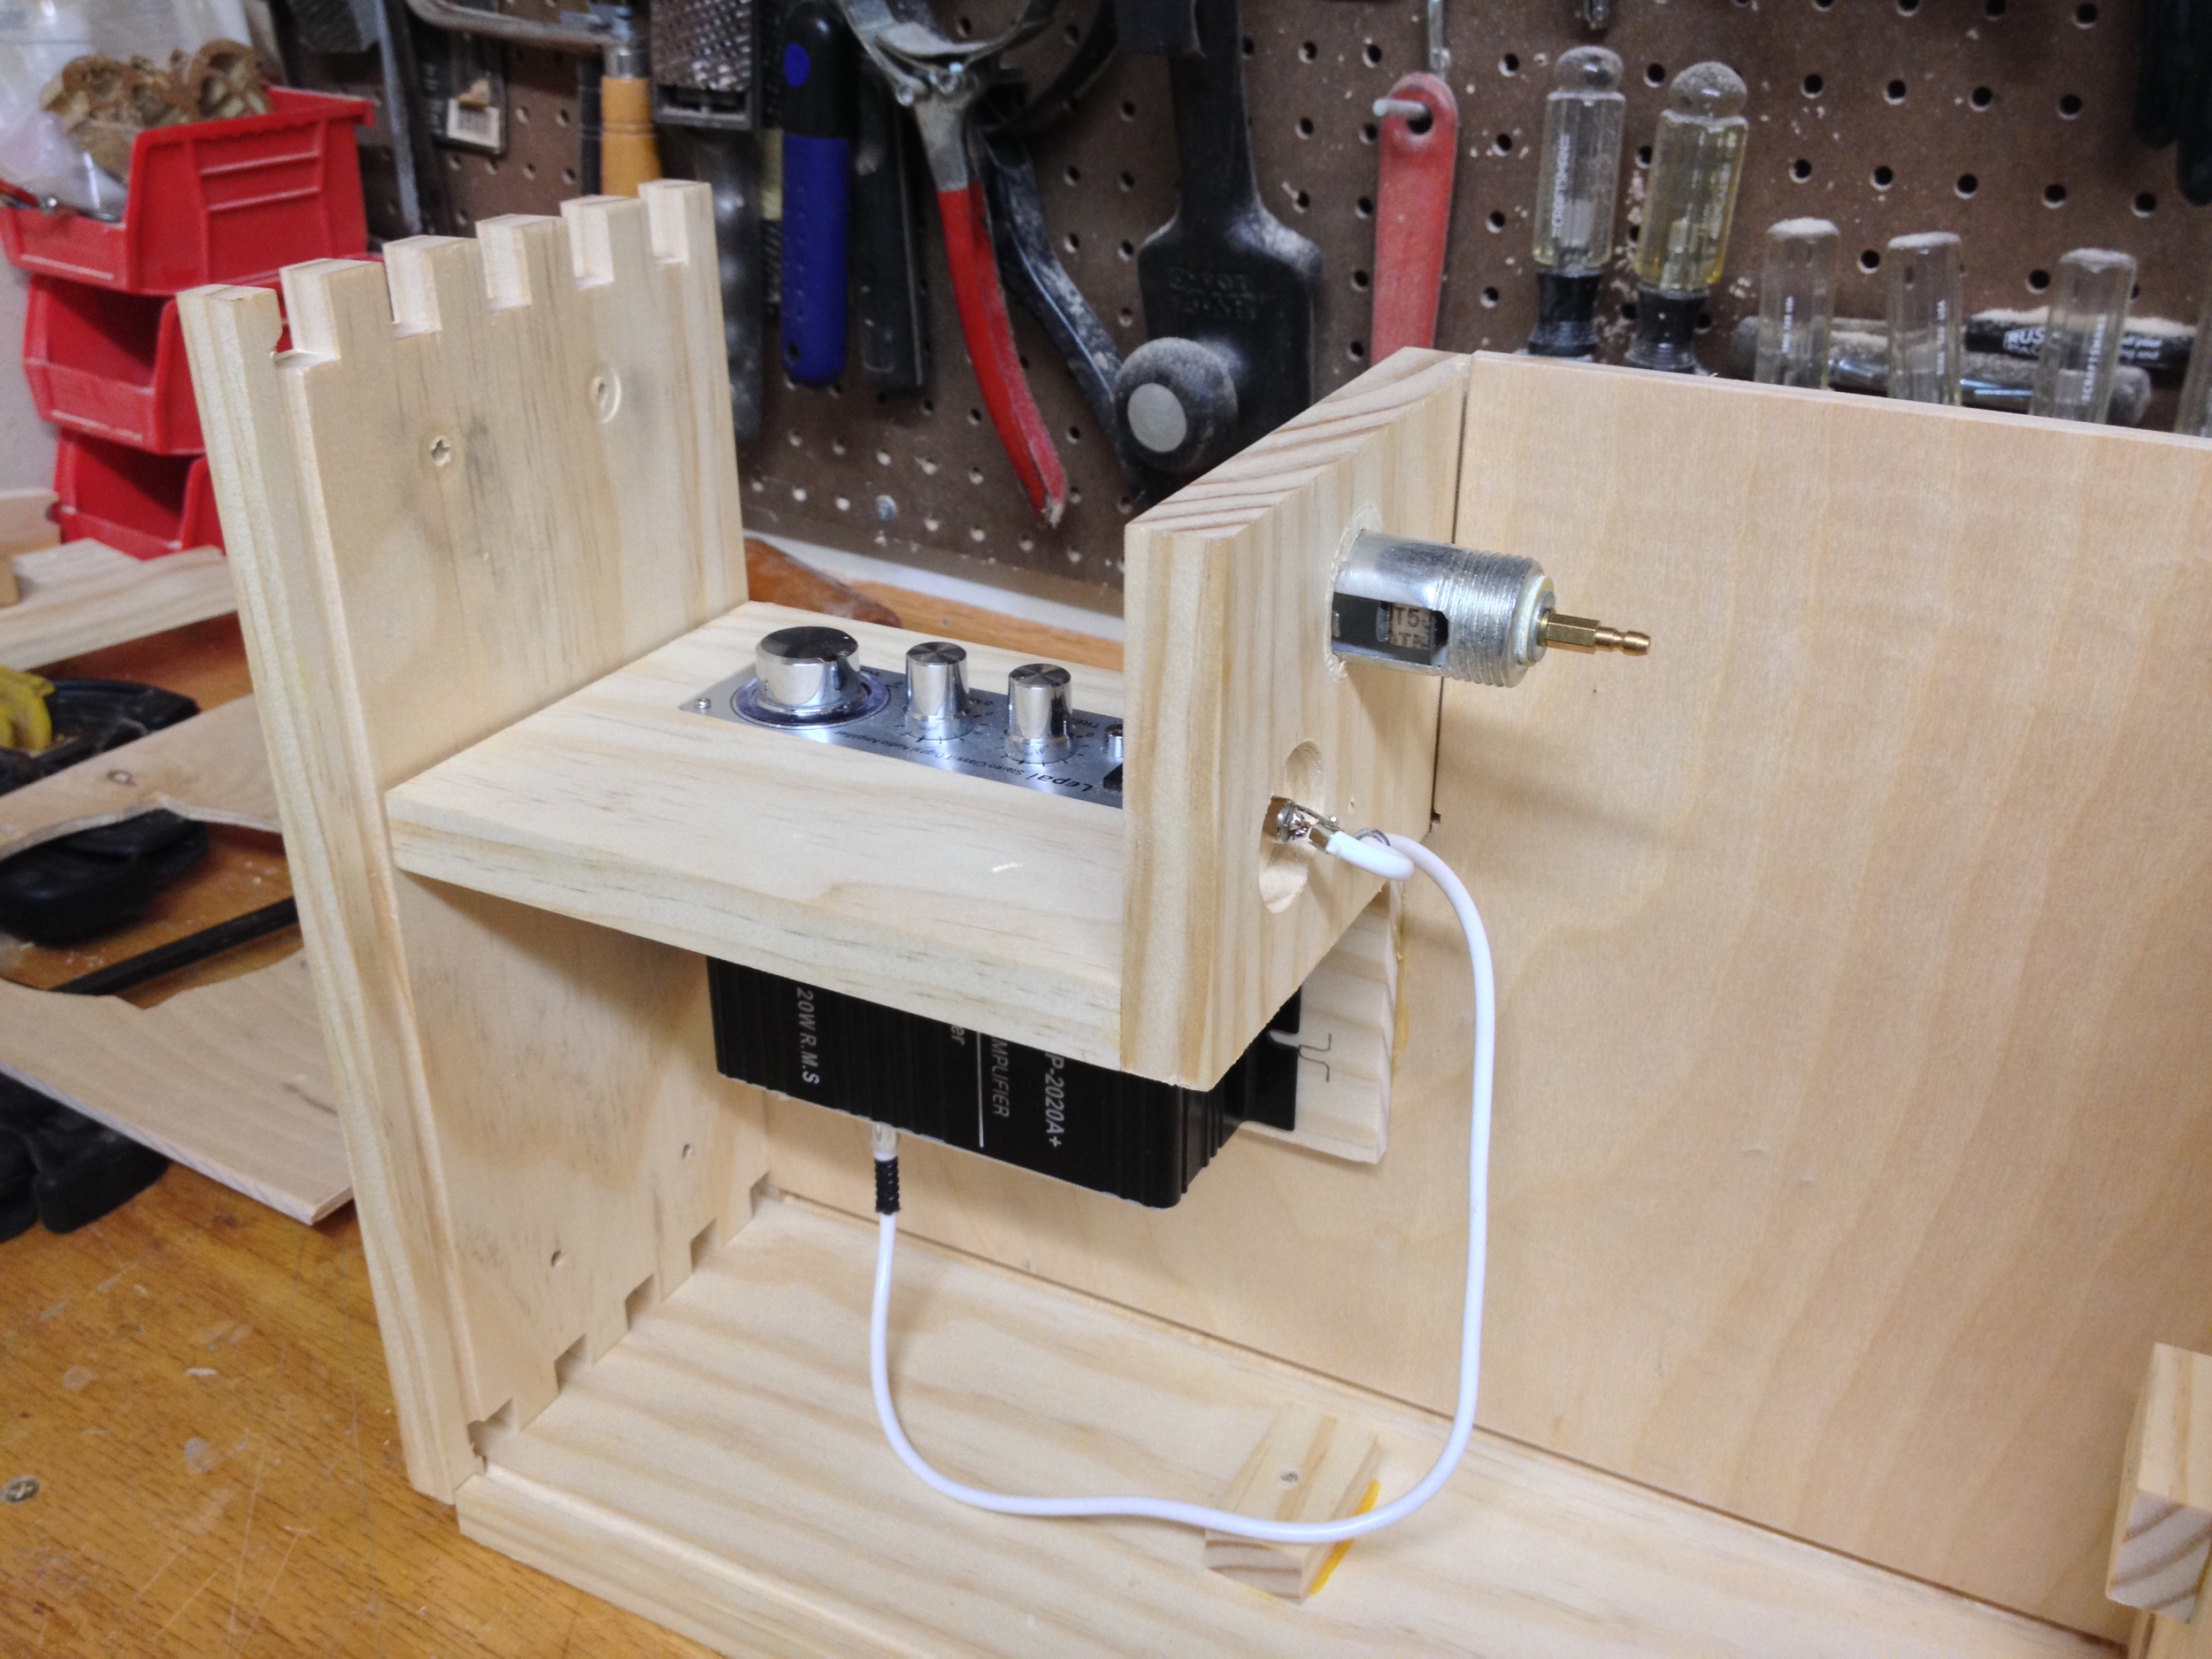
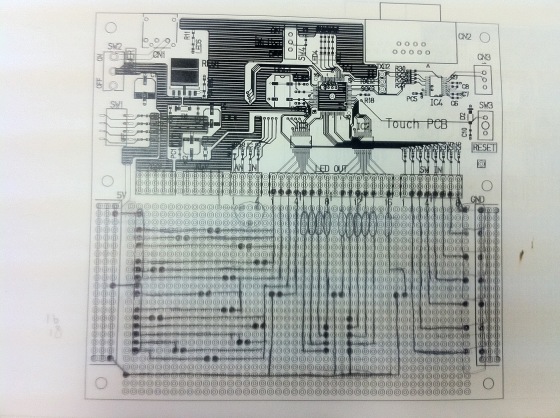
Since that seemed to work out well enough, I started to plan how to put the final circuit on a circuit board. I got a 55x40 hole circuit board which is slightly longer than will fit in the 5.5"x4.5" box I have to put it in. I laid out the circuit to see how it would fit in that space. I wanted to add 8 frequency bands with 10 LEDs each to have more detail, and it seems like this configuration with some 80 LEDs is about the max that will work on that sized board or in that size container. 

Circuit Diagram

Well that's all for now, I order the rest of the parts and when they arrive I can start soldering.

Finishing and Staining the Solar-Powered Stereo

We finished the Solar Powered Stereo this week, I think it came out really well. 

image.jpg
image.jpg

Looks a lot more professional than I imagined when I first decided to start this project.

Continuing where I left off from the last update, after the glueing, we needed to a lot of cleanup:

image.jpg

After a little power sanding and rounding the corners with the router, it looked much better:

image.jpg

Next we had to make a rabbet in the storage compartment for the door to close against:

image.jpg
image.jpg

 Fitting the door, cut from the same plywood as the back and front panels:

image.jpg

 After the first coat of stain:

image.jpg

Applying a coat of wipe-on polyurethane: 

image.jpg

After four coats of poly, I put on the metal feet and leather handles I bought from a guitar amp parts website:

image.jpg

Went with black for the the color of the speaker grilles:

image.jpg
image.jpg

We built a housing to sit on top of the solar panel and plexiglass. Edges were cut diagonally and glued together. You can also see the LED power indicator I mentioned previously, through an LED lens:

image.jpg

 Since the housing was glued end grain to end grain, on a side with very little surface area, it wasn't going to be a very strong bond. So we cut slits in each corner, and glued in a spline of another piece of wood. Since we could, we went with a spare piece of mahogany which added a nice accent color:

image.jpg

The wires coming from the solar panel had gotten a bit frayed after removing the unit from the original plastic case it was glued into and were no longer providing a reliable connection, but it was pretty easy to desolder them and solder in new ones. Testing the new connections:

image.jpg

Solar panel housing and door screwed on for the first time. Hinges are recessed into the door to allow it to close tightly:

image.jpg

Staining and applying polyurethane to the door and housing. You can see the knob for the door here. It was glued to a dowel, which in turn was glued to a hole in the door:

image.jpg

Final assembly. You can see the charging indicator LED from the solar panel lit up from the sun:

image.jpg

Used a magnet catch for cabinet doors, it's a little strong for the size of the door, but it has some play so I could try and recess it more to limit the strength:

image.jpg

One interesting and fortunate development was that although the first time we test fit everything and tested how the speakers sounded, they didn't sound that great. At the time I figured it was because the space inside the box was too small for the power of the speakers to have a completely sealed box like we did. But then we ended up notching these corners around the right speaker hole to make it possible to insert and remove the battery through that hole:

image.jpg

This seems to have acted like a "port hole", allowing air to escape, but the notches still fit under the speaker grille to hide them and limit exposure to the elements. This, quite luckily, seems to have significantly improved the quality of the sound the stereo produces.

Building the Solar-Powered Stereo Box

A friend and I have been working on making a wooden case for the Solar-Powered Stereo in our spare time for a few weeks (stretching into months) now.  Since he's pretty knowledgeable about woodworking and has quite the selection of dedicated tools for the job, we've really gone all out in a couple of ways.

First, we could have just used nails or screws to join the separate pieces of wood together, but instead we used more complicated techniques like dovetail joints, mostly for aesthetic reasons. 

We also used select pine and planed the pieces of wood down to get the desired thickness and ensure the edges were at 90 degree angles from each other.

The sides are made out of 1/4" plywood, and we cut grooves for them to be inserted into so they didn't require any glue or screws. The pieces of pine used for the storage compartment are a little thicker to give room for this groove on the outside, and for rabetting for the door on the inside (though the rabetting has not been done yet in these pictures):

Inside the storage compartment, we cut a hole for the amplifier's controls to be accessible through, and also one for the cigarette lighter socket (for charging mp3 players, etc.), and one for the 1/4" stereo cable jack. The amplifier casing also had to be modified to fit better in the hole. We also used a biscuit joiner to make a stronger connection between the vertical and horizontal pieces of the storage compartment.

One major concern was that, since the battery is the majority of the weight, it needed to be firmly secured to the case to prevent it from moving around inside and bumping into other components.  This also would allow the stereo to be carried in any orientation.

To accomplish this, we bent a wire to the form of the battery, and attached it with screws to some wood blocks which were in turn glued to the inside of the case.  There's some extra room to allow the battery to be taken out and put back in, and some pieces of wood used as removable shims to make it secure.

You can also see in that picture that the speaker hole above where the battery sits has square corners cut into it.  This was because we decided to make the back panel not removable to simplify the design, but still needed a way to get the battery in and out.  The speaker hole was not quite big enough for the battery to fit in at the angle it needed to in order to go inside the case. but with the corners cut, it fit in nicely.  It's a little bit of an ordeal getting the battery in and out, but hopefully it's not something that will be done very often.

The next step was to put everything together for a test of the sound.  You can also see the recessed area in the top where the solar panel will go.

Everything worked fine, though I don't think this makes the best speaker box.  For the size/power of the speakers, I don't think there's enough volume inside the box for it to be sealed like it is, and it might sound a lot better with a port hole cut to allow air to flow out.  I don't really know much about speaker box design, but I do know that adding a hole would mean it would be really easy for dirt or sand to get in if I took it to the beach, and it would really reduce the water resistance.  

So there might be some conflicting goals here (small size and portability and resistance to water/the elements, versus the best sound possible), but I think this is probably the right set of compromises for the intended outdoor use of this device.

The next step was to glue everything together. It required a lot of clamps. 

Next, there's a lot of sanding and staining to do, plus adding a door for the storage compartment and a housing for the solar panel, and lots of other finishing work. 


Previous posts about the Solar-Powered Stereo project: 

Charging the Battery From a Wall Socket 

Speaker Crossover Filter

Power indicator LED, voltage gauge

Solar-Powered Stereo (test build)

Solar-Powered Stereo (casing and schematics)

Solar-Powered Stereo (part 1)


Pool Allocator

Another useful memory algorithm is a pool allocator, which allocates lots of small blocks of memory of the same size.  Often times in programming games (and other applications) there are times where you need to allocate small chunks for same-sized items such as matrices, or multiple instances of the same object.  Obviously a pool allocator is the natural fit.  My implementation is below. 

--> Open PoolAllocator.cpp in a new window <--

The code above is hosten on Google Code, and you can comment by double clicking anywhere, or by clicking in the left hand margin on the little speech balloon plus icon. You need to be signed in with a google account.  Please comment and tell me if my code sucks!

Implementing a stack allocator isn't hard, but there is one important memory saving trick I'll discuss below:

  1. When creating the pool, preallocate a large block of memory, the size of which is a multiple of the size of the separate pool elements.
  2. Add each of the free elements to a linked list.
  3. When someone wants to use a block, pop one off the free list and return it to the user.
  4. When a block is freed, add it back to the free list.
  5. When deleting the pool, assert that the number of free elements is equal to the pool size divided by the size of an individual element.

That part is easy.  But we have to consider where we will get memory for the linked list to track the free elements.  Or do we?  We have all this free space in each of the free elements, why not put it to good use?

NOTE: The one caveat here is that the size of each element in the list must be larger than sizeof(void*)

To track the free items in the free list itself we do the following.

  1. When creating the pool, after allocating the memory, starting with the beggining of the list, write the address of the next free block at the start of the current block.
  2. When providing a block to the user, return the start of the list, but not before setting the pointer to the start of the list to the next block.
  3. When returning a block to the free list, write the address of the start of the free list into the start of the newly free block, and set the start of the free list to the newly freed block's address.

Remember that when using the memory of the free block itself as the pointer to the next block, the equivalent to 

mFreeListStart = mFreeListStart->next;

Becomes:

mFreeListStart = (u32*)*mFreeListStart;

Where mFreeListStart is a u32* to the start of memory of the first element in the list,

next is a u32* to the next element,

and  u32 is a 32-bit unsigned integer type.

Stack Allocator

So I said I was going to start working on my game engine project, and I know it seems like I've been doing a whole lot of nothing, but I've been working this whole time!  ...Well some of this whole time.

Working on what?  On Memory!

I've written a few different memory algorithms now, but I'll start with the simplest: a Stack Allocator.

--> Open StackAllocator.cpp in a new window <--

The code above is hosten on Google Code, and you can comment by double clicking anywhere, or by clicking in the left hand margin on the little speech balloon plus icon. You need to be signed in with a google account.  Please comment and tell me if my code sucks!

A stack allocator is useful in games because many games allocate memory for levels in a stack like manner.  When a new game level is loaded, the memory for all the textures and meshes etc is loaded at once, and then nothing more is allocated during the duration of the level.  When the level is unloaded, all of the memory is freed.  A stack memory allocator is perfect for this sort of application.

Implementing a stack allocator is pretty simple:

  1. In the constructor, malloc a block of memory to use as the stack, and set it as the base of the stack and as the current top (ensuring it's not NULL).
  2. When memory is requested from the stack, store the address of the current top to return, and then move the current top up by the size requested.
  3. When freeing, you just set the current top back to the marker passed to the freeToMarker function.
  4. Clear the stack by setting the current top back to the base of the stack.
  5. When deleting the whole stack, you can ensure all memory has been freed by asserting that the current top is the same memory address as the base

The next write up I believe will be Pool Allocators.

LED Pac-man in Assembly

As part of training for new employees at BNG, we planned, soldered, and programmed (in assembly) games on a practice circuit boards with Renesas 16-bit H8/300H Tiny Series processors (specifically the H8/3687). 

Here's a video of what I made:


As you can see, it's a Pac-man themed dot-eating game.  I implemented 3 modes:

  • The first mode is an attract mode, like you'd see in arcades (when nobody's playing the game, it plays itself).  The dots slowly enter Pac-man's mouth and he eats them and gets larger and it flashes when he's at maximum size.  Also the digital display (the green number 8 LED) spins around in a circle.
  • The second mode is a timing game, where you have to push the green button when the dot is in Pac-man's mouth.  He eats it and grows larger.
  • The third mode is a button sequence game in which you just push the buttons in the correct order to feed pack man. (When we were soldering on the components, there was a lot of colored switches, so I put as many on as I could, and I had to think of something to use them for so they didn't go to waste.)

In addition to being able to change modes with the black button, the brown button changes difficulty, which is actually adjusting the speed of the timer that controls everything.

Here's a picture of the circuit diagram as planned in advance, though it is a little different than how it turned out in the end:

Circuit Diagram!The code was written entirely in assembly, which was a new challenge for me.  Compared to writing in C++, it felt like everything took years to do.  But it does make you realize how every line of code you write in C++ is really comprised of a multitude of these moves between registers and RAM (not to mention chip cache) and how all this complex logic breaks simplifies down into branch-if-zero's and other simple math equations. One thing I didn't have time to do was to understand argument passing in functions.  It looked complex and I had a lot to implement, so I just copied and pasted a few functions rather than mess with trying to use a feature I don't fully understand on a platform with no debugging to help me understand what I'm doing wrong.  But it would have been nice to learn if I had the time.

The (amateurishly written) source is available for download here, and is also after the break, with some unfortunately pink syntax highlighting.